Olive Oil Chocolate Chip Muffins Recipe, Whole-Wheat Flour Power, Salt in Sweets, 9 Foods to Add to Your Diet Now and the Benefits of Walking
No muss, no fuss, and no mixer needed to whip up this week’s recipe—chocolate chip muffins that taste sinful but deliver all the benefits of olive oil. My secret ingredients are two types of flour (including whole-wheat flour_ you might not yet have in your pantry but will reach for time and again once you do. I’m also sharing new insights into fruits and veggies for brain health and why you don’t need to start at 10,000 steps a day to reap the benefits of walking.
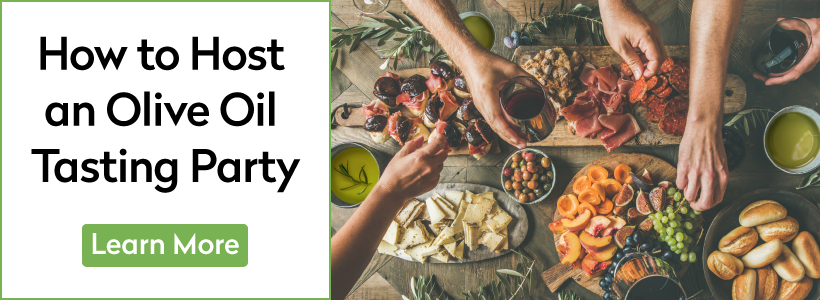
Extra virgin olive oil makes these muffins tender on the inside and crunchy on top. Using pastry flour creates a finer crumb, and the addition of white whole-wheat flour adds fiber and protein.
Ingredients
1 1/2 cups plus 1/3 cup pastry flour or all-purpose flour
2/3 cup white whole-wheat flour
2 teaspoons baking powder
3/4 teaspoon baking soda
1 teaspoon kosher salt
1 scant cup sugar
2 extra-large eggs
1 cup Greek yogurt
3/4 cup extra virgin olive oil, plus more for the muffin tin
1/3 cup milk
1 1/2 teaspoons vanilla extract
12 ounces dark chocolate chips or chunks
Directions
Step 1
Heat your oven to 350ºF. Grease a 12-muffin tin (including the spaces between the cups) with a small amount of olive oil.
Step 2
In a very large bowl, whisk the flour, baking powder, baking soda, and salt to combine.
Step 3
In another large bowl, whisk the sugar and eggs until well incorporated, and then whisk in the yogurt, followed by the olive oil, milk, and vanilla extract.
Step 4
Slowly pour it into the flour mixture, folding with a spatula as you go until the dry ingredients are mostly incorporated. Add the chips and continue folding until you no longer see any traces of flour.
Step 5
Use a large ice cream scoop to fill the muffin cups just about to the top (the muffins will nicely rise over the rims as they bake).
Step 6
Bake for 35 to 45 minutes, depending on your oven—they’re done when the tip of a dinner knife inserted into the center of 2 or 3 muffins comes out clean. Cool the pan on a wire rack before turning out the muffins.
Yields 12 oversized muffins
Healthy Ingredient Spotlight
Whole-Wheat Flour Power
I’m always looking for ways to “healthify” recipes, especially sweets. For instance, one of the great benefits of olive oil in place of butter is that you drastically cut the saturated fat. Another effortless swap is replacing some of the white flour in baked goods with whole-wheat flour, but not the standard type, which can make the finished food too dense. Instead, choose white whole-wheat flour made from white wheat, or whole-wheat pastry flour made from red wheat. Both are great, though I prefer white whole-wheat flour for sweeter foods, such as cakes and muffins, and whole-wheat pastry flour for more savory rolls and breads. As a rule of thumb, you can use either in place of 25% of a recipe’s all-purpose white flour without noticing a taste difference. The experts at the King Arthur Baking Company suggest that you can go as high as 50% with the white whole-wheat flour without adjusting liquids or rising agents, but going to that level with whole-wheat pastry flour may require tweaking. Experiment to see what tastes best to you.
Healthy Kitchen Nugget
Salt in Sweets
Since salt often gets a bad rap, you might wonder whether you really have to include it in baked goods. The answer is yes, because it brings out the flavor of other ingredients, including chocolate. When you do the math, one teaspoon, or even two, spread out over a dozen portions of a recipe means just a few grains per serving. In terms of sources of excess sodium, packaged and processed foods are the ones to watch out for. For the best results in home cooking, always use kosher or coarse sea salt.
For Your Best Health
Over the Rainbow: 9 Foods to Add Now
Flavonoids are among the most important phytochemicals—nutrients found in fruits and vegetables. It’s actually the umbrella term for many different types of plant nutrients. Anthocyanins, for instance, are well known for giving berries their bright hues. You often hear the advice to “eat a rainbow” because each fruit and veggie has its own unique mix of flavonoids, and you want to get as wide a variety as possible. Flavonoids are a great source of antioxidants, renowned for their ability to fight off the aging effects of oxidative stress and boost overall health. A major study done at Harvard and published in Neurology has found another reason to chow down on fruits and veggies. The researchers discovered an important link between eating lots of flavonoid-rich foods and lowering the odds of subjective cognitive decline (SCD)—how much memory loss or sense of confusion you feel in your daily life.
They looked at data from nearly 50,000 women and 28,000 men over roughly 20 years. Those who had the most flavonoids in their diet lowered their odds of SCD the most compared to those who had the least, they reported. Three types of flavonoids in particular—flavones, flavanones, and anthocyanins—had the most impact. Which fruits and vegetables did the participants eat most? Strawberries, blueberries, oranges, grapefruits (whole or juiced), apples, pears, celery, peppers, and bananas. Onions, peaches, cauliflower, Brussels sprouts, lettuce, and potatoes also ranked high. Another key finding is that it’s never too early to start enjoying these foods on a regular basis—think of it as making deposits in the bank of brain health.
Fitness Flash
Step to It
There are many ways to get and stay fit, and walking—considered a light-intensity physical activity, or LIPA—remains one of the easiest. Though we often hear that 10,000 steps a day is the ultimate goal, it may not be the right goal for you, according to Benjamin Washburn, MD, of the University of Missouri, and Joseph Ihm, MD, of Northwestern University Feinberg School of Medicine, authors of the article “Using Step Counts to Prescribe Physical Activity: What Is the Optimal Dose?” published in the American College of Sports Medicine’s Current Sports Medicine Reports. In their report, based on analyzing extensive data, and in a blog post on the topic, they detailed why a target step count should be personalized to each person’s current activity level and needs.
They wrote that “significant health benefits can occur at activity levels below 10,000 daily steps, especially if individuals increase their baseline activity by at least 1,000 steps per day. Several studies demonstrate that near-maximal or maximal health benefits can be achieved by engaging in predominantly LIPA totaling approximately 6,000 to 8,000 steps per day…At the lower end of the activity level spectrum, reaching a minimum of about 4,000 steps per day may be beneficial for many groups if they are at or below this level of activity at baseline.” They added that this may be a helpful goal for older people looking to start a walking program.
The concept of gaining more benefits with every additional 1,000 daily steps also applies to people already getting 10,000 per day. They pointed out that going beyond the weekly minimums set in physical fitness guidelines will likely keep you healthier than someone who achieves a lower level of activity. But “for some, a lower level of activity will still be better than being less active,” they stated.
Good Fortune Down Under: Three Spectacular Oils from the “Best Harvest in a Decade”
These shimmering beauties have been rushed to the US by jet (even in this time of limited travel) to preserve their exquisite flavors and nutritional content.
All three are Club exclusive blends, created expressly by yours truly.
All three have been independently lab tested to certify they are 100 percent extra virgin.
Expand your menus with the Aussie-inspired recipes featuring these vibrant, exceedingly food-friendly oils.
G’day, Mate!
I love Australia—its friendly people, its vibrant food culture melding international cuisines, the bustling, beautiful cities, and the stunning rural landscape. Our annual Australian olive oil quest usually begins in Melbourne and concludes in Sydney, where the Merry Band of Tasters and I regroup to celebrate before heading home. Several years ago, in 2014, the celebration took a special turn for the romantic when my then fiancée, Meghan, and I got engaged (see photo below). You can imagine why Australia has a special claim on my heart.
I held out hope that a trip to Oz would be possible this season, but ongoing travel restrictions shelved those plans. Once again, your trusty Olive Oil Hunter shifted into long-distance-logistics mode to conduct a remote hunt, drawing on the steadfast and treasured relationships I’ve built over the years to fulfill our mission of providing you with the finest, freshest olive oils on earth.
If only I could sing, I would’ve burst out with an aria! This photo documents my 2014 engagement to Meghan (now my wife), and we’re celebrating on the pier near the iconic Sydney Opera House. I’ve spent a total of a year of my life in Australia hunting for spectacular olive oils, delighting in the vivid culture, amazing food, and incredible people. This special land that locals call “the lucky country” has extended its good fortune to our Club again this season with the best olive harvest in a decade.
Australia: The Startup Kid
If you’re new to the Club, you might be wondering, “Australia? I didn’t even know they made olive oil.” They do, and it’s fantastic! Australia produces some of the world’s most acclaimed ultra-premium olive oil, with exquisite flavors and peak polyphenol content. The antipodal olive oil scene is young, energetic, and deeply innovative—described as a “hoodie-wearing tech startup kid in a room full of suits,” in contrast to the fusty approaches of many European producers. And, because Australia’s seasons are the opposite of ours, at this time of year the freshest, most flavorful olive oils in the world come from the Southern Hemisphere.
This year’s harvest is being hailed as the best in a decade, so, if this is your first experience of Australian olive oils, you are in for an extraordinary treat!
I’ve been scouting Down Under for at least 15 years. All in all, I estimate that I’ve spent a year of my life in Oz—after the 10,000-mile air journey from North Carolina, I make it a point to stay a while. My Merry Band and I often cover thousands of miles within Australia itself, as its land mass is 3/4 the size of the US but with about a tenth of the population. Most of my olive-growing contacts are in the southeastern state of Victoria, where traveling between farms can take several hours.
How the Olive Got Down Under
Olives were introduced to “the lucky country” by 19th-century Italian and Greek immigrants who, lore has it, cleverly smuggled olive plants into their new homeland by sewing the cuttings into the hems and lapels of their clothing. With a climate mirroring that of the Mediterranean, Australia provided a welcoming olive habitat. In 1895, industrious growers established an olive research station at Wagga Wagga, New South Wales, seeking to promote olives as a viable cash crop. But enthusiasm dwindled and the olive project was abandoned as Australia’s main agricultural focus turned to cattle ranching.
A century later, in 1995, in a wave of renewed interest, the contemporary olive oil scene got a jump start with the founding of the Australian Olive Association (AOA), which established some of the world’s highest standards for olive oil purity and nutritional content. Suddenly, olive groves cropped up across the Victorian countryside—tax incentives helped smaller farmers plant new groves or rehabilitate existing ones, and local fresh-pressed olive oil became a sought-after commodity at farmer’s markets. Many of those growers were weekend warriors with backyard groves, but some of them have endured to develop into celebrated full-time olive oil producers, with dazzling results. In a little more than a quarter century, Australian olive oil has risen to reap top awards at international olive oil competitions and is prized at home and around the globe.
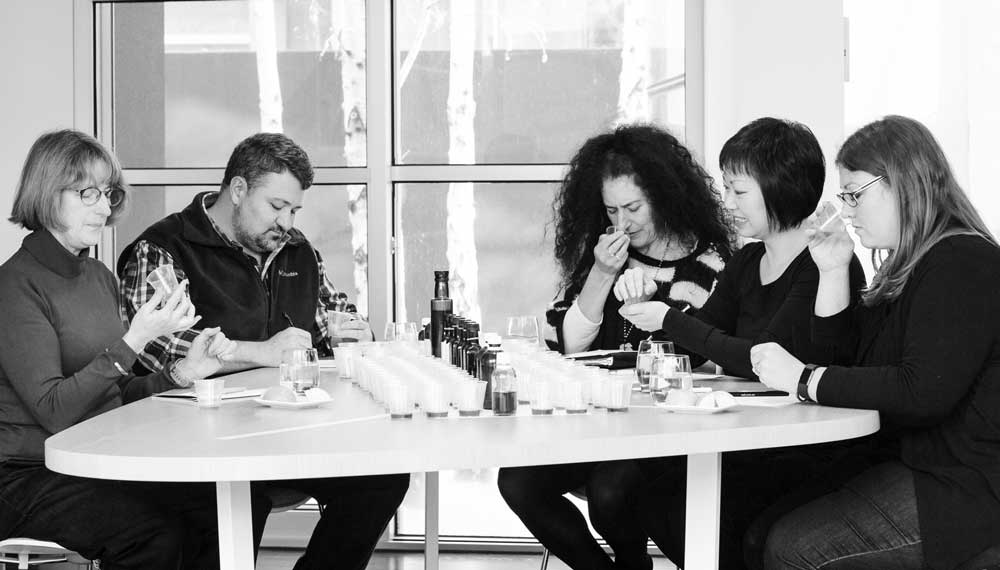
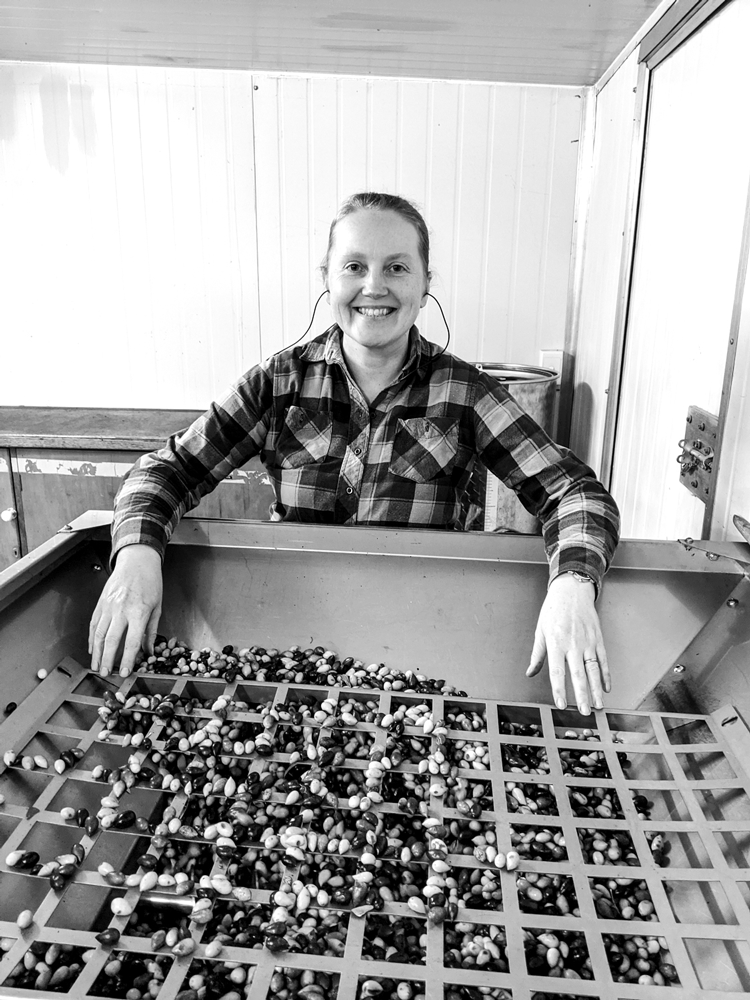
AuLife founder Melissa Wong (second from right, in 2017) has been instrumental in establishing a foothold for our Club in Australia. Not only do her tastes closely match my own, she also knows everybody in the foodie world, and her thoughtful connections have helped us build a loyal network of Australian olive oil experts. In previous seasons we’ve kicked off the Aussie olive oil quest with a grand tasting of outstanding oil samples at Melissa’s home in Melbourne. This season, the esteemed olive oil connoisseur Jill Barson (pictured here at far left) joined Melissa to curate the contenders that were then overnighted to me in the US.
Hands Across the Water
I’ve forged long-lasting relationships with Aussie olive oil experts, chief among them my dear friends Leandro Ravetti and Melissa Wong, whom you’ll get to know in this Pressing Report. Leandro, one of the world’s leading experts on olive horticulture and olive oil production, wrote the current set of rigorous AOA standards. Melissa is my trusted “heels on the ground” with an impeccable palate, scouting the best of the Aussie season for me in advance. Traditionally, my Merry Band and I begin each Aussie quest with a grand tasting at Melissa’s gracious home in the Melbourne suburb of Toorak (see photo above).
Leandro and Melissa both sent early word that this season’s olive harvest was truly “once in a decade.” Weather conditions were perfect and the fruit quality was fantastic. In a groundbreaking move for the Fresh-Pressed Olive Oil Club, Melissa’s legwork yielded a spectacular Picual from Tasmania, the heart-shaped island about 150 miles off of Australia’s southeastern coast, across the Bass Strait. Named for the Dutch explorer Abel Tasman, Tasmania is located at the same latitude as Tuscany—just flipped across the equator—and has a similar temperature range.
I fervently missed being there but was relieved that Mother Nature had allowed for a superlative harvest in light of the many logistical challenges to overcome. Leandro, Melissa, and I conducted extensive Zoom tastings and blending sessions to create the brilliant blends that you now have in hand.
I can’t transport you to Australia with your soulmate (although I wish I could), but I suspect strongly that you’ll fall in love when you engage with these magnificent, delightfully food-friendly oils from the opposite side of the earth!
Happy drizzling!
T. J. Robinson The Olive Oil Hunter®
This Quarter’s First Selection
Producer: Leandro Ravetti 2021, Boort, Victoria
Olive Varieties: Picual, Coratina
Flavor Profile: Mild
The headline, published by the Australian Broadcasting Company, confirmed what your Olive Oil Hunter already knew: “Victorian Olive Producers Revel in Best Season to Date.” Not only did I have samples of premium oils from this Aussie state lined up on my table, but I’d just concluded a Zoom call with Leandro Ravetti, a valued longtime friend of my Club.
“It’s been a fantastic season, the best in a decade!” Leandro crowed, confirming what my Australian scouts reported. The trees, he said, emerged strong from a wet, cool winter, flowered profusely, and set branch-bending amounts of fruit. A summer with ideal conditions followed, sparing the trees from destructive temperature spikes and bush fires. “Farmers love to complain, but we didn’t have much to complain about this year,” he noted with relief.
There was one peculiarity about this season’s Australian harvest: the olives began ripening earlier than usual, blindsiding some producers. However, a weeks-long lull in the process occurred when cool but stable autumn air descended on Southeastern Australia. This slowdown—call it “arrested development”—effectively prolonged the harvest. The phenomenon delivered big benefits to growers and consumers.
First, extra days on the tree enabled the fruit to develop more nuanced aromas and flavors, even in the early-harvest olives I favor. You’ll notice these sensory expressions when you taste the oils. And the delayed arrival of killing frosts—which quickly slam the harvest window shut on the best olives—made this a banner year for Victoria.
Second, growers had more time to react to one of this season’s biggest challenges: an acute shortage of farm labor. Australia, you see, has long relied on a pool of international workers to harvest its produce. According to Olive Oil Times, as many as 200,000 backpackers were employed as farm laborers prior to the pandemic, fulfilling almost 80 percent of the country’s seasonal needs. Most have returned to their respective countries.
Leandro conceded that staffing was more difficult this year, but he managed with about 90 percent of his usual harvest crew. The team simply worked longer hours. Anecdotally, Leandro told me some growers of highly perishable produce—he mentioned peaches—were paying significantly higher hourly wages and offering signing bonuses as large as $5,000 to entice workers.
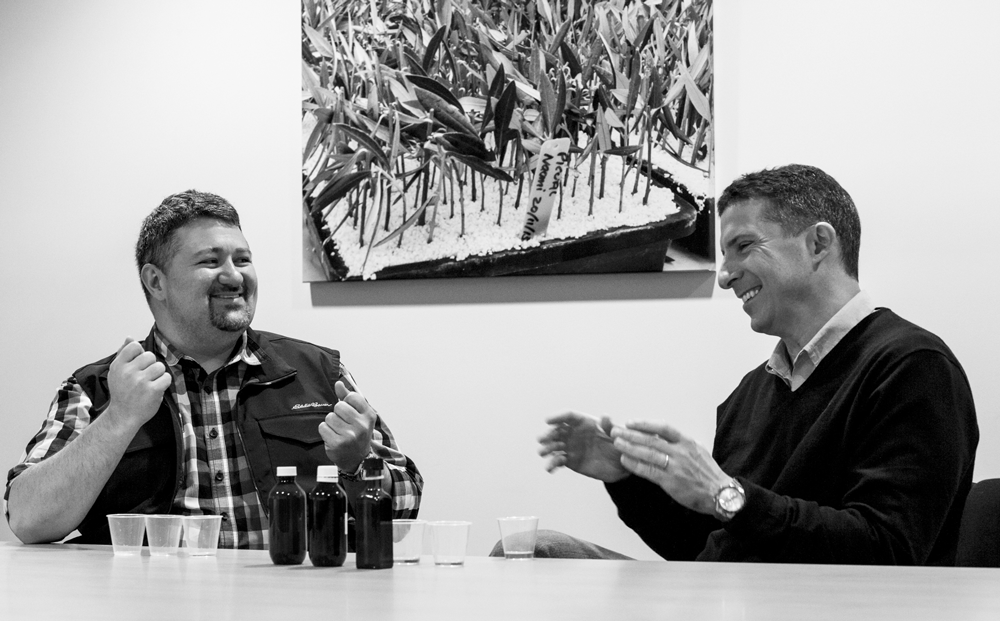
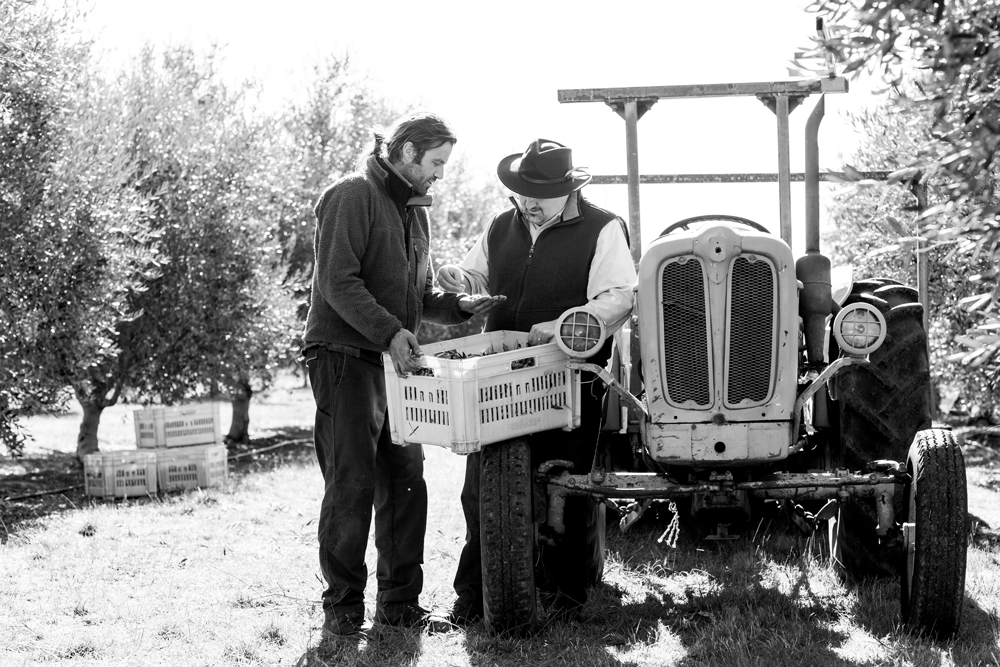
This photo (from my 2014 album) brought to mind a conversation I had recently with olive oil authority Leandro Ravetti. We agreed that millers often get all the love, but it’s the agronomist or farm manager who makes the magic happen by caring for the trees day to day, making decisions that will directly impact the quality of the finished oils. The award-winning Leandro plays both roles.
In addition to the epic Australian harvest, Leandro is celebrating his 20th year in Australia. (Originally, he intended to stay just two years.) The Argentinean graduated with honors in 1996 with a degree in agricultural engineering from the National University of Catamarca before completing post- graduate work in Italy and Spain. In 2001, the rising star was recruited by Modern Olives of Lara, Victoria. As the technical director of the company, which offers laboratory and consulting services, Leandro quickly established himself as one of the world’s most influential olive oil experts.
As comfortable in a sweatshirt as a bespoke suit (echoing his ability to diplomatically straddle the crevices between Old and New World producers), the youthful-looking Leandro marvels at the places his training has taken him. “When I came here as an agronomist, it was with the thought of improving olive oil quality standards. I only intended to stay two years. It’s truly been an amazing journey.” And though he recently moved to a lust-worthy waterfront apartment in Geelong, a 3-hour drive from Boort, this guy shows no signs of slowing down.
I have worked closely with Leandro for more than a decade. Our mission? To help my Club members build what we call “taste libraries” in the way wine connoisseurs who know their grapes do. Like me, he is continually refining his own sensory catalogue, and appreciates the top-tier oils I’ve sent him from Europe and Chile—the same oils my Club members receive. (He was very eager to try the rare Tasmanian Picual; read about it below.)
A funny story: Last year, I sent the Australian oils to Leandro’s parents in Argentina, knowing they’d be proud to see his name on the label. “They were,” he reported. “But my mother said she actually preferred the Nullamunjie.” We had quite a laugh over that.
The exclusive Leandro Ravetti blend you just received features two incredible extra virgin oils. One is an intriguing Picual, a Spanish varietal that seldom appears in the Club’s mildest selection. The second is a stunning Coratina, one of the finest he’s produced, says Leandro. What a special privilege it is, dear Club member, to taste the best extra virgin olive oils in over a decade from a passionate producer a half a world away!
His extraordinary knowledge and expertise are in demand on every continent where olive oil is produced and/or judged. Yet, master miller Leandro Ravetti has always been generous with his time during my visits to Australia. He is very attuned to my preference for premium early-harvest oils, annually reserving the most promising sections of his groves for our Club. Behind us, the striking photo is an enlargement of olive tree cuttings.
Impressions and Recommended Food Pairings
This fragrant oil shows the softer side of Picual and Coratina, typically muscular cultivars. It’s a dazzling golden-green in the glass, the nose evoking green banana, endive, golden apple, and marzipan along with the green herbal notes of tomato leaf, sweet basil, and baby spinach. Rich and harmonic in the mouth, redolent of banana, green beans, and celery, with the bitterness of endive. Expect a lingering, white pepper finish.
Try this food-friendly oil with eggs or dairy (yogurt, mild cheeses, ice cream); fruit or vegetable smoothies; granola; pasta; yellow curries; potatoes; roasted yams; crudités; salads; autumn fruits; chicken, pork, and turkey; shellfish, especially lobster, or mild fin fish; baked goods including quick breads.
This Quarter’s Second Selection
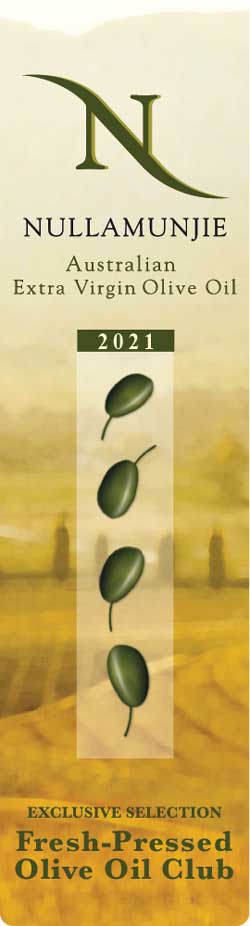
Producer: Nullamunjie 2021 Blend, Tongio, Victoria
The late Danish comedian and musician Victor Borge once said, “Laughter is the shortest distance between two people.”
Which explains how 10,000 miles and 14 time zones seem to fall away when I speak to one of my dear friends, olive oil producer Annie Paterson, via video conferencing. Because we laugh. A lot. Ask my Merry Band of Tasters, who remember fondly all the chuckles, giggles, and gleeful moments we’ve shared during our many visits to Annie’s hillside olive groves and mill. Hilarity has always run like a strong thread through our relationship with this remarkable woman.
The entrepreneurial fire was kindled in Annie (real name: Annetta) when she was in her early twenties. Captivated by the beautiful olive trees she saw from a tour bus en route to Delphi, Greece, Annie was convinced they would thrive in the rocky, mineral-rich soil of her family’s Victorian cattle ranch. Her instincts were spot-on: Southeastern Victoria and southern Greece are roughly equidistant from the Earth’s equator. Both are located near the 37th parallel and have similar climates. But olive groves were a rarity in Australia at that time, and Annie’s father, perhaps trying to protect her from disappointment, declined to sell the young woman land.
She married and raised four children before realizing her dream. In 1998, Annie acquired property in East Gippsland at the base of Mt. Stawell. Part of the land’s appeal was its proximity to the Tambo River and the scenic Great Alpine Road. Six hundred olive trees were planted initially, including Frantoio, Correggiola, and Leccino. All are Italian varietals that have adapted well to the microclimates of the Victorian Alps. Today, the energetic pearl-wearing grandmother oversees some 3,000 trees. From my perspective, that’s an optimal number for a hands-on grove owner to manage: neither too big nor too small.
And Annie is nothing if not hands-on. In one of my favorite images of her, she is smiling broadly while wearing a hardhat and wielding a chainsaw. “I absolutely love pruning,” she said. She employs a post-harvest technique called vase-pruning that she learned at a New Zealand olive oil conference. Select scaffold branches are pruned to within a foot of the trunk, maximizing sun exposure to the tree’s center and maintaining the tree’s overall health and compact, harvest-friendly shape.
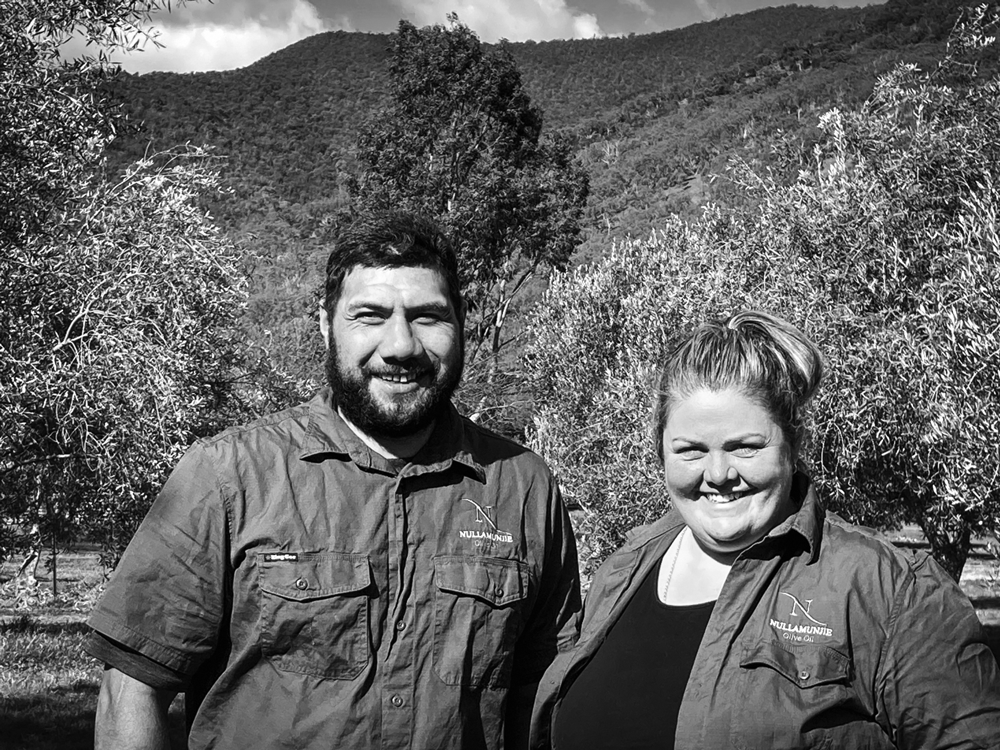
“Intelligent, enthusiastic, and best of all, cheerful,” is how Annie Paterson, the proprietress of Nullamunjie, describes Heneli and Emma Halafihi. For the past four years, Emma has helped Annie operate The Pressing Shed Café (in Australia, olive mills are called pressing sheds). She is Annie’s second-in-command. Heneli joined Annie’s team in January and has taken on the duties of farm manager.
Speaking of harvests, Annie had my team and me in stitches recently during a mirthful Zoom-enabled reunion.
With her irrepressible good humor, she recounted her attempts to hire dependable olive pickers. The usual pool of willing and experienced labor including family, “grey nomads” (older roving farm workers), and the occasional backpacker had all but dried up due to pandemic-related travel restrictions. Her version of the story could’ve inspired an episode of I Love Lucy. But the resourceful Annie eventually cobbled together a harvest team with “can-do” attitude (including secondary school students on break) that wasn’t afraid of hard work and that treated her tender olives with care and respect.
Near perfect weather conditions meant most producers on Australia’s east coast enjoyed improvements over 2020 in olive quality and yields. Many Victorian producers—Annie included—enjoyed one of their best seasons in a decade.
Social gatherings are still restricted in parts of Australia, meaning Annie’s popular restaurant, The Pressing Shed Café, is temporarily closed. Brisk local sales of her extra virgin olive oils keep her busy, however, and remind her of the renewed interest in home cooking. She also has a new puppy—a rambunctious Cairn terrier—that joyfully joins her on quiet walks in the olive grove.
The extra virgin olive oil you just received is a unique blend created exclusively for members of the Fresh-Pressed Olive Oil Club. It’s a very well-balanced and versatile oil, one I know you’ll enjoy with your seasonal menus.
Preparing and sharing meals with Annie Paterson, the founder of Nullamunjie, has always been a joyful activity for me and my Merry Band of Tasters, one we can’t wait to resume. A seat at her table guarantees you’ll eat exceedingly well, consume lots of just-pressed extra virgin olive oil (it’s featured in every course, including dessert), and laugh until your sides ache. In this photo, taken in 2016, Annie and I select portobellos for a stuffed mushroom appetizer we made up on the spot.
Impressions and Recommended Food Pairings
This exquisite blend is grassy and herbaceous on the nose, delivering fresh basil, thyme, parsley, artichoke, and green almond with pear and baby arugula. Romaine lettuce leads in the mouth. Also wheatgrass, green apple, almond, rosemary, and wild mint. Enjoy a green tea-like astringency on the finish as well as the pepperiness of arugula.
Pair with coarse bread and salt; white beans, lentils, and chickpeas; broccoli; flatbreads; roasted or grilled meats; pesto; oilier fish such as salmon, tuna, or barramundi; sturdy greens; roasted squash, turnips, parsnips, or carrots; roasted pears or apples; charcuterie; and chocolate desserts.
This Quarter’s Third Selection
Producer: AuLife 2021, Toorak, Victoria
Olive Varieties: Coratina, Correggiola, Picual
Flavor Profile: Bold
Have you ever enjoyed a dish that was elevated to an entirely different plane by the addition of a minuscule amount of a special, maybe even precious ingredient? I’m thinking, for example, of floral-tasting Persian saffron added to Arborio rice to make Risotto Milanese. Just a few golden-red threads do the trick. Or fresh pasta dusted with delicate shavings of earthy but extravagant white truffle.
The outstanding Tasmanian Picual featured in this distinctive blend is one of those transformative ingredients, the gold dust to Homer’s “liquid gold”—the ancient world’s term for olive oil. And we have my longtime friend Melissa Wong to thank for this taste experience, dear Club member.
I first met the vivacious Melissa, a Columbia and Harvard alum, in New York when we were both involved with the Food Network. Later, the worldly Melissa (she was born in British Columbia to Chinese immigrants) indulged her entrepreneurial ambitions by opening an Italian restaurant in Beijing with a Michelin 2-star chef. After relocating to Melbourne with her attorney husband, Robert, she founded AuLife to promote Australian olive oils and other fine foods from Down Under.
I could not have predicted that years later, Melissa would play such an important role in my quest to put the world’s finest extra virgin olive oils on Club members’ tables. She has hosted olive oil tastings for me and my Merry Band of Tasters at her lovely Toorak home, introduced me to several New World olive oil authorities, scouted tirelessly for the best Aussie producers, and managed with her characteristic charm and competence many pesky logistical details.
Melissa’s experience and refined palate—not to mention the discovery of the aforementioned Picual—helped me fine-tune this special blend sourced from Victorian and Tasmanian oils. Melissa’s extensive contacts, even in a pandemic-challenged year, made it possible.
Melbourne-based food authority, the indomitable Melissa Wong, has been a dear friend for 20 years. We have similar palates, making our collaboration on the boldest oil in your trio, AuLife, relatively easy despite the necessity of conducting our tastings remotely. Thankfully, she wasn’t intimidated by the logistical challenge I gave her of combining two Victorian oils with one (a Club first) from the island of Tasmania.
We started with pressings from two award-winning producers, both familiar to us and longtime Club members: an exceptional Coratina from Boort master miller and olive oil expert Leandro Ravetti (read more about him below), and an equally stunning Correggiola from Kyneton Olive Oil. Both varietals are originally from Italy and typically have high polyphenol levels. They make up the bulk of this blend. Though I found the combination brilliant, I craved a tad more structure and intensity. A small dose of a boutique Picual was…well…just what the doctor ordered.
As a matter of fact, Tasmanian producer Fiona Makowski is a medical doctor. She and her husband, Glenn, bought their 50-acre farm (called Freshfield Grove) near Hobart eight years ago. Together, they tend about 1,000 trees, a mix of Picual and Manzanilla varietals, that were planted by the property’s previous owners. A diminutive on-site mill enables them to press their olives promptly, often within minutes! Pre-pandemic, they also hosted a popular community-wide pressing for people with smaller quantities of fruit. They hope to resume the tradition next season.
For Fiona, a native of the UK, living in Tasmania—population 500,000—is a dream come true. (Glenn is originally from Hobart.) The island state is the smallest in Australia, separated from the main continent by the Bass Strait. Nearly half the land is dedicated to national parks, wilderness areas, and World Heritage sites. It hosts some of the planet’s most eccentric wildlife, including the Tasmanian devil, a cute but famously ill-tempered marsupial about the size of a small dog.
Fiona Makowski and her husband, Glenn, founded Freshfield Grove in 2014 after purchasing a 50-acre farm in Tasmania’s picturesque Coal River Valley. It was a bold move, given that the couple knew little about olives (Fiona is a physician). So it’s fitting that their bold Picual blew me away. The Makowskis are thrilled that their small-batch boutique oil is in the hands of Club members. Me, too!
Fiona says she and Glenn knew little about olives when they acquired the farm. But she is an enthusiastic researcher. A week’s immersion in Italy’s olive oil culture also helped the young couple get their bearings. Still, Fiona found pruning to be intimidating. “I was so afraid I’d kill the trees,” she laughed. “And some of them did have a weird shape for a while.” Her long-term goal is to maintain the trees’ compact shape for easier hand-harvesting. Today, Fiona is the president of the Tasmanian chapter of the Australian Olive Association (AOA) and mentors other less experienced growers. “I am so excited to send our oils to faraway shores,” she gushed.
Of all the olive-growing regions in the world, Tasmania is among the most extreme. Leandro Ravetti recalls a certain Tassie slogan: “Cool food from wild places.” Frost is a frequent seasonal threat in the higher southern latitudes for the slow-to-ripen olives. Yet Tasmanian oils, Leandro points out, often steal the show at AOA-sponsored competitions.
This is the first time I’ve had the opportunity to send my Club members a blend containing a Tasmanian Picual and such outstanding exemplars of Coratina and Correggiola. These New World expressions of Old World flavors will be a thrilling addition to your cool-weather table. Please let me know what you think!
Italian master miller Davide Bruno obtained a special visa to work in Victoria during the Australian harvest; his formidable skills were deemed “critical.” After a 14-day quarantine, he resumed his seasonal duties at Kyneton Olive Oil. Davide, from Liguria, oversaw the pressing of one of the key components of the AuLife blend, an outstanding Correggiola. This bold oil is truly a melding of the Old (Italy) and New (Australia) worlds.
Impressions and Recommended Food Pairings
The grassy olfactory profile of this truly international blend includes Tuscan kale, ripe tomato, kiwi, citrus, thyme, watercress, and a bit of nuttiness. Bitter—almost chewy—in the mouth, but very well-balanced. We tasted lime zest, radicchio, fennel, tomato leaf, dried bay leaf, and parsley. Also the spiciness of watercress and Szechuan peppercorns.
This is a powerful oil, a match for beef or lamb; duck or game birds; salmon or mackerel; tomato-based dishes such as marinara or pizza; aged cheeses; roasted root vegetables; dark, robust greens; cruciferous vegetables; kidney or black beans; and dark chocolate.
Olive Oil and Health
The Effects of the MIND and Mediterranean Diets on Parkinson’s Disease
Adapted from an article by Dr. Rebecca Gilbert, American Parkinson’s Disease Association, May 4, 2021
New research into the best diets for Parkinson’s Disease (PD) reveals the Mediterranean and MIND diets may be associated with later age of onset of PD. Components of a Mediterranean diet include vegetables; fruits; whole grains; legumes such as beans, peas, and lentils; nuts; low-fat proteins, such as fish and poultry; and olive oil.
Another diet, known as the Dietary Approaches to Stop Hypertension (DASH) diet, was designed to help treat and prevent high blood pressure and emphasizes many of the same principles as the Mediterranean diet. More recently, experts suggested a combination of the Mediterranean and DASH diets, meant to maximize cognitive benefits. It is entitled the Mediterranean-DASH Intervention for Neurodegenerative Delay (MIND) diet. Components of the MIND diet include green, leafy vegetables; all other vegetables; berries; whole grains; beans; nuts; poultry; fish; red wine; and olive oil.
The principles of the MIND diet are very similar to the Mediterranean diet, with some notable additions. The MIND diet recommends green leafy vegetables such as spinach and kale as the first choice over other vegetables. Berries (such as blueberries) are specifically promoted, as opposed to fruit in general. A small amount of red wine daily is also encouraged. (Please discuss this with your doctor.)
Why do these diets work?
The scientific underpinnings as to why these diets affect brain health are not fully understood and likely consist of a combination of different positive benefits—some of which have been established and others that have not. It is possible that the established heart benefits of the diets drive some of the brain health benefits. That is, the diets promote healthy hearts and clean blood vessels and therefore support excellent blood flow to the brain. It is well established that vascular disease in the brain can contribute to cognitive decline as well as the motor symptoms of Parkinsonism. Therefore, ensuring that the brain achieves good blood flow has positive benefits on brain health for everyone, especially those who have a disease such as PD.
In addition, specific components of the foods encouraged in these diets may work on the cellular level to protect neurons from cell death or decrease neuroinflammation. But knowing which elements are conferring the benefit is not straightforward. To date, researchers have not been able to identify a specific nutritional supplement that achieved the type of benefits in clinical trial demonstrated in this diet study. Currently, therefore, the best way to ingest the nutrients that protect the brain is through a comprehensive dietary plan and not by taking a defined group of supplements.
Takeaways
A new study has demonstrated that the MIND and Mediterranean diets are associated with a delay in onset of PD symptoms
Both of these diets emphasize vegetables, fruits, whole grains, legumes, nuts, and olive oil
The MIND diet adds green leafy vegetables and berries as important elements
Reference: Metcalfe-Roach A, Yu A, Golz E, et al. MIND and Mediterranean diets associated with later onset of Parkinson’s Disease. Mov Disord. 2021;36(4):977-984. doi: 10.1002/mds.28464.
Kudos from Club Members
Subscribing for years and still loving it! I’ve been subscribing for years and love these oils and the surprises of the occasional vinegars!!!
Penny L.Yankee Hill, CA
I can really notice the difference My husband and I really enjoyed your Cannellini Bean and Gorgonzola Bruschetta recipe last Friday night in front of the TV, with a simple salad also using your fine olive oil….It was delicious and a nice change from our usual pizza night! I can really notice the difference and quality of your oils vs the store-bought ones…so thanks again.
Lois and Bill S.Tampa, FL
Upgrade to the big bottles This oil is SOOO good! I started with the small bottles and ran out! Immediately upgraded to the big bottles. And they are pairing so well with T. J.’s vinegars!
Deborah M.Big Bay, MI
The proof is in the tasting. Until you try these oils you will never know the difference from all the others. The proof is in the tasting.
Margaret S.Lexington, OH
Magnificent oils! What a joy to read your poetic descriptions of your magnificent oils! And even a bigger pleasure is enjoying them. I feel privileged to be able to receive your olive oils and thank you so much for your extraordinary work.
Gratefully, Marcella B.Syosset, NY
Had to order another set. Just finished a breakfast salad with the latest delivery from Italy. Mixed greens, spinach, touch of balsamic, couple tablespoons of the Brunetti, and finished each bite with goat cheese on rice cracker. OMG. Had to order another set.
Bill J.Corbin, KY
Cannot wait til the next delivery. My first 3 bottles are almost gone! Best oil I have ever tasted! I shared it with my friends. Cannot wait til the next delivery.
Roger C.Elk Grove Village, IL
Don't leave home without it I take my oil with me when I travel, and I can no longer stand the refined olive oil and stopped buying it. Grocery store EVOO tastes bland and uninteresting.
Tiffanie B.allahassee, FL
Olive oil makes everything better! I’m so excited!!!! I just drained the last drop out of my extra bottle that was sent from you and I wasn’t sure what I was going to do. My family uses your olive oil on and in everything. To quote my daughter “that olive oil makes everything better.” It’s cause for excitement and joy in this household when we get notice that our olive oil will be coming! Yippee skippy olive oil is on its way!!!
The Fritz FamilyLandisburg, PA
Instead of flowers, send oil! TJ, I just want to let you know I just received my bottle. I opened it and took a spoonful right away even though it’s only 8:30 in the morning, but I didn’t care, I had to taste it. And you are right, it is amazing! I will be sending your oils as gifts for birthdays, anniversaries, Thanksgiving, and Christmas instead of flowers. Because your olive oil has the perfect bouquet! Thank you so much for caring enough to make perfection.
TonnatoThis versatile Italian sauce is traditionally served over poached veal. But we love it on chicken, crudités, cooked vegetables (like green beans), and even as a sandwich spread. For mayo, try Japanese Kewpie, Duke’s, Hellmann’s, or Best Foods. You can customize the tonnato by adding a pinch of red pepper flakes, a splash of hot… view recipe
Sheet Pan Chicken and MushroomsPerfect for a weeknight, this easy meal (it can be served right from the sheet pan, which reduces clean-up time) is more impressive when made with different varieties of mushrooms. Feel free to substitute chicken breasts for the thighs if you or your family prefer white meat. view recipe
Ottolenghi’s Burrata with Grilled Grapes and BasilDelight family or dinner guests with this decadent cream-filled cheese (a member of the pasta filata, or “pulled cheese,” family). Here, it’s partnered with sweet grilled grape skewers and exquisite best-quality olive oil. For the salt, I recommend Australia’s flaky, apricot-colored Murray River salt. view recipe
Smoked Salmon and Nori RollsLuscious hot-smoked salmon is a specialty of the island of Tasmania, an offshore Australian state. A bit of wasabi gives these colorful rolls a “devilish” flavor profile. If you prefer, replace the edamame spread with a schmear of cream cheese mixed with wasabi paste. A mandoline is a handy tool for slicing the cukes. view recipe
Spice-Rubbed Greek-Style Lamb BurgersMy wife, Meghan, and I love the bold flavors of these grilled lamb burgers. We suggest a Greek salad (greens, tomatoes, sliced cucumber, Kalamata olives, crumbled feta, and a vinaigrette made with extra virgin olive oil and red wine vinegar) as a side dish. If you’re avoiding carbs, you can serve the burgers atop the… view recipe
Eggs and Greens in Olive OilLike many followers of the Paleo lifestyle, we’ve been frying eggs in EVOO for years and have never looked back. We love the crispy edges, the incomparable flavor, and, of course, the health benefits. Ingredients 3 tablespoons extra virgin olive oil, divided use2 large eggs2 cups baby spinach or other tender greens of your choiceCoarse… view recipe
Wakey-wakey Spiced Persimmon SmoothieAvailable during the fall and winter months, seedless Fuyu persimmons are prized throughout the world for their nuanced flavors (reminiscent of pear, pumpkin, and brown sugar) and lack of astringency. Olive oil gives this vitamin- and antioxidant-packed smoothie a rich mouthfeel. view recipe
Pear Salad with Blue Cheese, Olive Oil, and MintSouth of Melbourne is Tasmania’s King Island, recognized around the world for its outstanding dairy products. One of them is a particularly unctuous waxed blue cheese known as “Roaring 40s Blue.” It is named after the punishing 100 km/hr winds (62 mph) that bedevil the latitude of 40°S. If unavailable, substitute your favorite blue cheese,… view recipe
Cauliflower, Cashew, and Coconut CurryCurries have been popular in Australia since the 19th century, reportedly helping newly arrived British colonialists adapt to the island continent’s unfamiliar proteins, like wombat and kangaroo. Here, we offer you a vegan version of the dish. view recipe
Delight family or dinner guests with this decadent cream-filled cheese (a member of the pasta filata, or “pulled cheese,” family). Here, it’s partnered with sweet grilled grape skewers and exquisite best-quality olive oil. For the salt, I recommend Australia’s flaky, apricot-colored Murray River salt.
Ingredients
12 ounces seedless red grapes, pulled off the vine
2 tablespoons sherry vinegar
3 tablespoons extra virgin olive oil
1 garlic clove, peeled and crushed, divided use
1 1/2 teaspoons dark or light brown sugar
1 1/2 teaspoons toasted fennel seeds, lightly crushed, divided use
Flaky sea salt, such as Murray River (see above) or Maldon
Coarsely ground black pepper
3 balls of burrata or buffalo mozzarella
Small basil sprigs, for serving
Directions
Step 1
Put the grapes in a medium bowl with the vinegar, olive oil, garlic, sugar, 1 teaspoon of the fennel seeds, 1/4 teaspoon of flaked salt, and plenty of pepper. Mix well and marinate for at least 1 hour and up to 1 day. Thread 5 or 6 grapes onto each of 12 skewers. Reserve the marinade for serving.
Step 2
Place a grill pan over high heat and ventilate your kitchen well. Once hot, add the grape skewers in batches and grill for 2 to 3 minutes, turning after 1 1/2 minutes. Remove from the heat.
Step 3
To serve, tear the balls of burrata in half and place one-half on each plate. Lean 2 grape skewers against each piece of cheese and spoon 1 1/2 teaspoon of the marinade over the cheese. Or arrange the cheese and grape skewers on a platter. Sprinkle with the remaining 1/2 teaspoon of fennel seed. Garnish with basil before serving.
Serves 6 as a starter — Recipe adapted from food52.com
Chilean Empanadas de Pino Recipe, Spotlight on Grinding Your Own Beef, How to Manage Stress and a Link Between Exercise and Brain Health
I love empanadas (if I’m being honest, I love all kinds of meat pies!), but they can seem daunting to make at home. This week’s recipe breaks it down for you. One step that makes every ground meat dish better is grinding the meat yourself, and it’s a snap with a countertop appliance you might already have…as long as you follow one simple step. I’m also sharing two important health discoveries—a creative way to manage stress and a newfound benefit of exercise that’s the latest example of the mind-body link.
Stuffed meat pies are part of nearly every culture. This very popular Chilean version builds on the pino—sauteed and beautifully seasoned ground beef—by adding a bounty of other flavors to the filling.
Ingredients
For the dough:
3-3/4 cups unbleached all-purpose flour
1 tablespoon sugar
1-1/2 teaspoons salt
12 tablespoons unsalted butter, cut into 1/2-inch cubes and kept chilled
1-1/4 cups ice water
For the filling:
3 tablespoons extra virgin olive oil
3 cloves of garlic, finely minced
3/4 pound of ground beef, preferably chuck
1 large onion, peeled and finely diced
1 teaspoon ground cumin
2 teaspoons sweet paprika
1 teaspoon dried oregano
1 teaspoon hot sauce, or more to taste
Salt and pepper to taste
For the assembly:
null
3 hard-boiled eggs, peeled and quartered lengthwise
12 brined large green or black olives, pitted
3/4 cup golden or sultana raisins
1 egg
1 tablespoon of water
Directions
Step 1
Make the dough: In the bowl of a food processor, pulse the flour, sugar, and salt just until combined. Add the chilled butter and pulse again until the butter bits are about the size of peas—be careful not to overprocess.
Step 2
Transfer the mixture to a large bowl, then add the water, 1/4 cup at a time, stirring and pressing it into the flour mixture with a spatula until you get a cohesive dough (you may not need all the water).
Step 3
Turn the dough out onto a clean, lightly floured work surface and divide into 12 portions. Form each portion into a ball, place the balls on a plate, cover with plastic wrap, and refrigerate for an hour for easier rolling.
Step 4
Prepare the filling: Heat the olive oil in a large frying pan over medium-high heat until it shimmers. Add the garlic, beef, and onion and sauté until the onions are translucent, about 5 minutes. Add the spices, hot sauce, and salt and pepper and cook for another 3 to 4 minutes until the meat is cooked through. Set aside to cool for about 15 minutes.
Step 5
Assemble the empanadas: Set out two large baking sheets. Working on a well-floured surface with a well-floured rolling pin, roll one of the dough balls into a 6- or 7-inch circle about 1/8-inch thick.
Step 6
Place 2 heaping tablespoons of the meat mixture in the lower half of the round and arrange an olive, an egg quarter, and a tablespoon of raisins on top of the meat. Fold the upper half of the dough over the filling to create a half-moon shape. To seal it, fold up the edge along the half-moon by about 3/4 inch and crimp all along the way with the tines of a fork for a braided look. Use a large spatula to transfer the empanada to one of the baking sheets. Repeat with the rest of the dough balls.
Step 7
Bake the empanadas: Preheat your oven to 425°F. Make an egg wash by breaking the egg into a small bowl and whisk it thoroughly with the tablespoon of water. Use a pastry brush to lightly brush the tops of the empanadas with the egg wash. Bake on two racks in the oven until golden brown, about 20 minutes, rotating the pans at the halfway mark for even browning.
Makes 12 — Recipe courtesy of the Fresh-Pressed Olive Oil Club
Healthy Ingredient Spotlight
Grinding Your Own Beef
There’s no better way to elevate ground meat than to grind your own, and it’s not complicated. If you’ve got a Kitchen Aid stand mixer, invest in the grinder attachment (the kit also includes stuffer tubes for making your own sausages!). If you’ve got a food processor, you can simply use the steel blade—it will have a denser texture because it’s mincing rather than grinding.
For the best grind, everything needs to be icy-cold. Prep your meat by cutting it into 1-inch cubes, spreading them out on a baking sheet, covering with wrap, and popping in the freezer for 15 minutes along with your grinder or processor blade. For the grinder attachment, follow manufacturer instructions. For the processor, use the pulse button for the best control, so you don’t end up with a mash instead of a mince.
Healthy Kitchen Nugget
Choosing and Using a Pastry Brush
Pastry brushes might seem like a luxury, but a simple natural boar-bristle brush from a company like Ateco is only a few dollars, and the golden finish from painting an egg wash on pastry before baking is more than worth it. Silicone brushes are easier to clean (they can go right in the dishwasher), but a thin egg wash doesn’t coat their bristles well—save silicone for a thicker application, like brushing BBQ sauce on ribs. To clean a natural bristle brush, rinse it under warm water, rub a small amount of dish detergent into the bristles, and rinse again. Blot the bristles with paper towels and let the brush air dry, flat, on a clean dish towel. When the bristles start falling out or if the brush develops any odors, it’s time to replace it.
For Your Best Health
Making Stress Work for You
For years, Jeremy Jamieson, PhD, associate professor of psychology and the principal investigator at the University of Rochester’s Social Stress Lab, has been developing ways to rethink how people can deal with stress. Because stress is a normal part of life, it’s better to change how you think about it than to ignore it. For his latest study, published in the Journal of Experimental Psychology: General, college students were taught to see stress as a positive—a tool rather than an obstacle. As a result, they lowered their anxiety levels, scored higher on tests, and responded to academic challenges in a healthier way.
“We use a type of ‘saying is believing’ approach to learn about the adaptive benefits of stress,” said Dr. Jamieson. For instance, tell yourself that your sweaty palms and racing heart are responses that can energize you to perform well. “Stress reappraisal is not aimed at eliminating or dampening stress,” he explained. “It does not encourage relaxation, but instead focuses on changing the type of stress response: If we believe we have sufficient resources to address the demands we’re presented with—it doesn’t matter if the demands are high—if we think we can handle them, our body is going to respond with the challenge response, which means stress is seen as a challenge, rather than a threat.” Try it and see for yourself!
Fitness Flash
A Link Between Exercise and Brain Health
A group of scientists led by Bruce M. Spiegelman, PhD, the Stanley J. Korsmeyer Professor of Cell Biology and Medicine at the Dana-Farber Cancer Institute and Harvard Medical School, has just released its latest research on irisin, a hormone produced by muscles during exercise and discovered by Dr. Spiegelman in 2012. After research on human brains found that irisin, named for the Greek messenger goddess Iris, was absent in people who had died of Alzheimer’s disease but was present in others, the team wanted to explore how the hormone might be involved in brain health.
The most recent study, published in Nature Metabolism, used a variety of lab experiments involving mice to show that irisin can cross the blood-brain barrier and improve cognition—thinking and memory—in both healthy animals and those with a rodent version of Alzheimer’s. These findings suggest that the simple act of exercising could change the course of brain function as we age and lower dementia risk. While it will take research involving humans to learn what types and frequency of exercise are best, these results already suggest that exercise can be as good for your brain as we know it to be for your heart, which should motivate all of us to get moving.
 Olive Oil Chocolate Chip Muffins