Pasta with Spicy Red Clam Sauce Recipe, Spotlight on Clams, Is There a Downside to Going Sugar-Free, and The Perils of Muscle Loss
Summer and seafood are a natural pairing. For a change of pace from shrimp and lobster, try this zesty clam sauce over your favorite pasta. My quick tips take the trepidation out of their prep. I’m also sharing some surprising contrarian research about sugar-free diets as well as another reason why muscle strength is so important later in life.
Summer’s bounty of cherry tomatoes is ripe (pun intended) for a rich and spicy clam sauce. While clams may seem daunting, they’re no more complicated to steam than a lobster. Just be sure to buy the freshest—and smallest—ones you can find.
1/4 cup extra virgin olive oil, more for drizzling
6 garlic cloves, peeled and chopped
1/4 teaspoon crushed hot red pepper flakes, more to taste
4 cups cherry tomatoes, Sungolds if possible
Large sprig fresh basil
8 ounces pasta such as thin spaghetti or linguine
Directions
Step 1
Steam the clams on a rack over about 2 inches of boiling water in a large, covered stockpot until they open, about 6 to 8 minutes. Remove the rack with the clams and set aside until cool enough to handle, then pull the clam meat from the shells and place in a small bowl. Drizzle with olive oil to keep moist and cover. Boil down the clam broth in the stockpot until it reduces to about 1 cup; set aside off the heat.
Step 2
Heat a large wok or Dutch oven over medium heat. When hot, add the 1/4 cup oil and the garlic and cook until garlic is sizzling, about 1 to 2 minutes. Add the red pepper flakes and sauté for 1 minute. Add the cherry tomatoes and cook until they burst, about 5 minutes, then use a potato masher to release their juices. Add the reserved clam broth and the basil and simmer, uncovered, for about 8 minutes or until the sauce has reduced.
Step 3
While sauce is cooking, cook the pasta in a large pot of salted water until al dente, about 8 minutes. Use tongs to transfer the pasta to the pan with the sauce and toss to coat. Discard the basil and add the clams just to heat through.
Yields 2 servings
Healthy Ingredient Spotlight
Clams
The best clams for red sauce are sweet and tender littlenecks or Manilas. The larger the clam, the tougher it can get, but if you happen to come across fresh varieties of these, like cherrystone or chowder clams, steam them just until they open and cut into small pieces with kitchen shears. It’s also possible to use canned baby clams for a simplified version of red clam sauce—add water to the liquid to make the needed cup of clam juice.
Quick Kitchen Nugget
Storing and Purging Fresh Clams
As soon as you get home, take the clams out of any sealed plastic bag or wrapping. Discard any clams with cracked or broken shells. If any are slightly open, tap the shell or give it a light squeeze. If it closes on its own, it is alive and safe to keep. If it stays open, throw it away.
To keep live clams fresh, store them in the refrigerator in an open, breathable container like a colander covered with a damp cloth. For extra chilling, you can nest the container inside a slightly larger bowl filled with ice, making sure that any melting ice water will stay below the clams—you don’t want them sloshing in fresh water.
About 30 minutes before you’re ready to cook the clams, purge them in a saltwater bath to encourage them to spit out any sand. Rinse the clams in cold water and scrub their outer shells to remove any loose mud or dirt. Mix 1/4 cup of sea salt into 1 gallon of cold water and submerge them for 30 minutes (if possible, place them on a steaming rack in the bowl so the sand will sink to the bottom). Use your hands to lift them out of the water and proceed with your recipe.
For Your Best Health
Is There a Downside to Going Sugar-Free?
It’s a provocative idea: Giving up sugar entirely may not be as beneficial as many people assume. New research presented at ENDO 2026, the Endocrine Society’s annual meeting, suggests that completely removing sugar from your diet could have unintended effects on gut and metabolic health.
Researchers from the Dasman Diabetes Institute in Kuwait examined what happened when mice were fed a low-fat diet that contained no sucrose, a common form of sugar. The study compared those animals with a control group that received a low-fat diet containing sucrose over a 16-week period.
To evaluate the effects of eliminating sucrose, the researchers measured glucose tolerance, insulin sensitivity, circulating metabolic hormones, the gut microbiome, and inflammation in both the colon and liver.
Despite maintaining similar body weights, mice on the sucrose-free diet experienced several negative health changes compared with the control group. These included poorer glucose control, insulin resistance, imbalances in gut microbes, intestinal inflammation, and changes associated with fatty liver disease.
“Completely removing sucrose from a low-fat diet may unexpectedly disrupt gut health and promote inflammation and metabolic dysfunction, highlighting that balanced nutrition is more important than simply eliminating sugar,” said Rasheed Ahmad, PhD, principal scientist and head of the Immunology and Microbiology Department at the Institute. “The study highlights the importance of maintaining balanced dietary carbohydrates to support gut and immune homeostasis.”
According to the researchers, little was previously known about the potential consequences of highly restrictive low-fat diets that eliminate sugar entirely. “This research may influence future dietary recommendations by emphasizing the importance of maintaining a healthy gut microbiome rather than focusing only on sugar restriction,” Dr. Ahmad said. “In the long term, these findings could help improve strategies for preventing and managing metabolic disorders, fatty liver disease, and chronic inflammatory conditions.”
Fitness Flash
The Perils of Muscle Loss
Scientists have discovered that aging muscle may contribute to cancer growth by releasing fewer extracellular vesicles, tiny particles that cells use to communicate with one another.
Their study also found that the composition of these particles changes with age, weakening protective signals that help suppress tumor development. Encouragingly, exercise appears to restore this protective function. Published in the journal Nature Communications, the findings offer fresh insights into healthy aging and cancer prevention, as well as point to potential biomarkers and therapies tailored to older adults.
The effects of aging muscle are especially evident in sarcopenia, a condition marked by loss of skeletal muscle mass and strength. Working with collaborators from Singapore General Hospital and Cardiff University, the scientists found that sarcopenic muscle secretes fewer extracellular vesicles. As muscle ages, these vesicles also contain lower levels of miR-7a-5p—a microRNA or a very small RNA molecule that helps regulate gene expression by controlling the types and amounts of proteins cells produce and also plays a role in restraining tumor growth.
Importantly, the team also discovered that the release of extracellular vesicles from muscle is controlled by a biological pathway that declines with age but can be reactivated through exercise. “Muscle cells use extracellular vesicles to send messages and influence how other cells behave, but exactly how these messages are delivered and received is not fully understood,” said Assistant Professor Tang Hong-Wen from the Cancer & Stem Cell Biology Signature Research Programme at Duke-NUS Medical School and senior author of the study. “Our research uncovers this hidden process, showing that as muscles weaken with age, these signals can change in ways that can promote tumor growth.”
“Clinically, we observe an association between advanced cancer and low muscle mass. This is a novel study which illustrates how healthy muscle can potentially inhibit tumor growth,” said Kenon Chua, a consultant in the orthopedic surgery department at Singapore General Hospital and one of the authors of the study. “We observe that healthy muscles secrete many physiologically important molecules. With advanced age, it is even more important to engage in regular resistance and aerobic exercises in order to maintain healthy muscle volume. This is important not only for function and mobility, but also for general health. We hope that the insights from our research can help us develop new targeted therapies for our patients as well as convince more people of the benefits of regular exercise.”
With their study, the scientists have established a direct biological link between aged muscle and tumor growth. Together, the findings reveal a muscle-to-tumor communication pathway that could be targeted to develop new therapies aimed at preventing cancer progression.
Summer’s bounty of cherry tomatoes is ripe (pun intended) for a rich and spicy clam sauce. While clams may seem daunting, they’re no more complicated to steam than a lobster. Just be sure to buy the freshest—and smallest—ones you can find.
1/4 cup extra virgin olive oil, more for drizzling
6 garlic cloves, peeled and chopped
1/4 teaspoon crushed hot red pepper flakes, more to taste
4 cups cherry tomatoes, Sungolds if possible
Large sprig fresh basil
8 ounces pasta such as thin spaghetti or linguine
Directions
Step 1
Steam the clams on a rack over about 2 inches of boiling water in a large, covered stockpot until they open, about 6 to 8 minutes. Remove the rack with the clams and set aside until cool enough to handle, then pull the clam meat from the shells and place in a small bowl. Drizzle with olive oil to keep moist and cover. Boil down the clam broth in the stockpot until it reduces to about 1 cup; set aside off the heat.
Step 2
Heat a large wok or Dutch oven over medium heat. When hot, add the 1/4 cup oil and the garlic and cook until garlic is sizzling, about 1 to 2 minutes. Add the red pepper flakes and sauté for 1 minute. Add the cherry tomatoes and cook until they burst, about 5 minutes, then use a potato masher to release their juices. Add the reserved clam broth and the basil and simmer, uncovered, for about 8 minutes or until the sauce has reduced.
Step 3
While sauce is cooking, cook the pasta in a large pot of salted water until al dente, about 8 minutes. Use tongs to transfer the pasta to the pan with the sauce and toss to coat. Discard the basil and add the clams just to heat through.
Watermelon & Feta Skewers Recipe, Spotlight on Watermelon, Storing Feta, The Facts on Flavanols, plus Strength Training and Longevity
Summer and watermelon go hand in hand, and this twist on the classic watermelon and feta salad is fun to put together and even more fun to eat. I’m also sharing two timely studies on ways to combat heart disease and increase longevity: eating more flavanol-rich foods and strength training for an hour and a half to two hours a week—two strategies you can actually enjoy.
These skewers are a refreshing appetizer for summer gatherings and a great finger food—no forks required. It can be prepped a few hours in advance, but wait until you’re ready to serve before drizzling with the oil and vinegar.
Ingredients
One 5-pound or larger watermelon
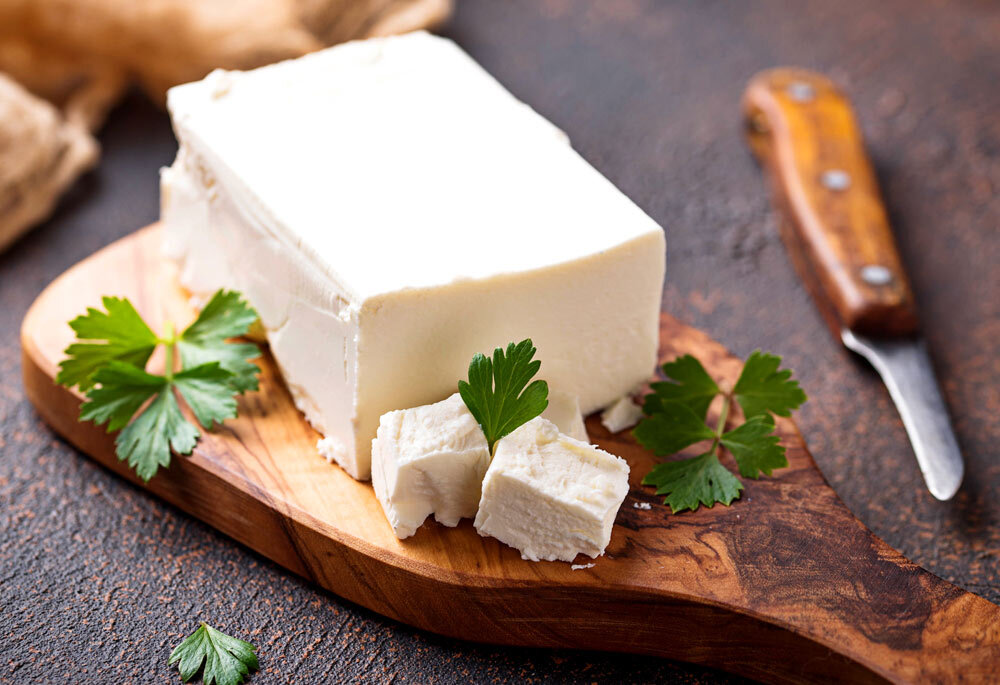
16-ounce block of feta cheese, preferably from Greece
Twelve 8-inch wooden skewers
Extra virgin olive oil, for drizzling
Balsamic vinegar of Modena, for drizzling
Freshly ground black pepper to taste
Directions
Cut the watermelon and the feta into 1-inch cubes. Thread 2 cubes of each in an alternating pattern onto wooden skewers. Arrange on a platter, drizzle with olive oil and vinegar, and sprinkle with black pepper.
Yields 12 skewers
Healthy Ingredient Spotlight
Wild for Watermelon
Watermelon is more than a summertime refreshment—it’s a nutrient powerhouse that, being 92% water, deliciously counts toward hydration.
Watermelon has more of the antioxidant lycopene than any other fresh fruit or vegetable. Lycopene is linked to a lower risk of cancer, heart disease, and age-related eye disorders. Just one cup of watermelon chunks contains 865 IUs of vitamin A, 12 milligrams of vitamin C, 170 milligrams of potassium, and a small amount of vitamin B6.
When shopping for a whole watermelon, look for one that is firm, symmetrical in size and markings, and solid for its size. It should have a deep yellow spot on the underside, which comes from sitting on the ground and ripening. A spot that’s white or pale yellow often indicates that the melon was picked too early and will not be sweet enough.
Quick Kitchen Nugget
Storing Feta
Containers of feta are typically sold with the cheese submerged in the brine it was made with to prevent it from drying out (I’m a fan of those imported from Greece). If you buy a block from a cheese store and it’s wrapped in paper, use it within a day or two. Place any extra in a covered glass dish and drizzle liberally with olive oil before refrigerating. The olive oil not only protects it but also imparts great flavor—you can even add aromatics like herbs, lemon slices, and crushed black peppercorns for marinated feta.
For Your Best Health
The Facts on Flavanols
Leading health organizations suggest eating a minimum of 5 portions of fruits and vegetables combined every day, with a daily split of 1.5 to 2 cups of fruit and 2.5 to 3 cups of vegetables.New research has found that this goal isn’t enough if you’re not choosing foods rich in flavanols, compounds linked to better heart health. According to earlier studies, it takes about 500 milligrams of flavanols per day to significantly lower the risk of death from heart disease.
For the new study, published in the journal Food and Function, scientists from the University of Reading in the United Kingdom, Harvard Medical School, the University of California, Davis, and Mars, Inc., analyzed dietary data from more than 30,000 people in the UK and the US using biomarker measurements to assess flavanol intake. They found that fewer than 20% reached the flavanol intake level associated with heart health benefits. Even many people who regularly ate the recommended five daily servings of fruits and vegetables failed to meet the flavanol target.
Said Dr. Javier Ottaviani, the study’s lead author, “Flavanols can significantly reduce the risk of dying from cardiovascular disease, but only if you consume enough of them. Most people assume that eating plenty of fruit and vegetables covers this, but what this research shows is that the specific choices you make matter far more than the total amount.” Having a handful of blackberries, a whole apple, or a cup of green tea with a meal could make a real difference to how much of these beneficial compounds you actually consume and absorb from the diet, he added.
Said Professor Gunter Kuhnle of the University of Reading, “Five-a-day is the right message, but we may need to think more carefully about which five. Different fruits and vegetables offer very different nutritional benefits beyond vitamins and minerals, and as our understanding of these compounds grows, there is a real opportunity to make dietary guidance more specific and more effective. This research is a step towards understanding what that might look like in practice.”
Here are the foods the researchers identified as some of the richest dietary sources of flavanols per serving:
Plums, 500 grams: about 450 milligrams of flavanols
Cranberries, 250 grams: about 300 milligrams of flavanols
Blackberries, 200 grams: about 250 milligrams of flavanols
Green tea, 250ml cup: about 200mg of flavanols
Broad or fava beans, 80 grams: about 140 milligrams of flavanols
Cherries, 400 grams: about 130 milligrams of flavanols
Apples with skin, 200 grams or one medium apple: about 110 milligrams of flavanols
Strawberries, 200 grams: about 90 milligrams of flavanols
Blueberries, 150 grams: about 80 milligrams of flavanols
Pinto beans, 40 grams or two tablespoons dry: about 70 milligrams of flavanols
Fitness Flash
Strength Training and Longevity
According to a study done by an international group of researchers and published online in the British Journal of Sports Medicine, 90 to 120 minutes of strength training a week may deliver some of the biggest long-term health rewards. That level of exercise was linked to a 19% lower risk of death from cardiovascular disease and a 27% lower risk of death from neurological disease. Combining strength workouts with aerobic exercise produced even stronger benefits. However, there was no additional advantage from doing more than 120 minutes of strength training per week.
While the life-extending benefits of aerobic exercise are well established, the impact of muscle-strengthening activities on overall mortality and specific causes of death has been less clear. The researchers wanted to determine whether strength training alone, or combined with aerobic exercise, could influence those risks.
To investigate, they analyzed data collected from three major American studies: the Health Professionals Follow-up Study (1992-2022), the Nurses’ Health Study (2002-2021), and the Nurses’ Health Study II (2003-2021). Together, the studies included 147,374 participants (31,540 men and 115,834 women).
Every two years, participants reported how much time they spent each week doing strength training and aerobic exercise. Aerobic activities included brisk walking, running, jogging, swimming, cycling, tennis, squash, strenuous outdoor work, and stair climbing. Strength training included exercises using weights or body weight, such as press-ups, squats, and lunges.
At the start of the study, participants were an average of 54 years old. Those who reported higher levels of strength training were generally younger, weighed less, followed healthier lifestyles, and engaged in more aerobic activity than those who did no strength training.
About three quarters (74%) of participants exceeded the recommended 150 minutes of moderate-intensity aerobic exercise per week, equivalent to 7.5 MET hours over the long term. METs measure how many calories are burned during physical activity compared with resting. Nearly half (46%) of participants reported doing some form of strength training.
The researchers found that higher long-term levels of weekly strength training were associated with a lower risk of death. After accounting for other factors that could affect the results, participants who performed 90-119 minutes of strength training per week had a 13% lower risk of death from any cause. Cancer-related benefits appeared at lower amounts of strength training. Participants who performed 1-29 minutes per week had a 21% lower risk of cancer death, while those doing 30-59 minutes per week had an 18% lower risk.
Compared with people who did less than 7.5 MET hours of aerobic activity per week and no strength training, participants who performed strength training alone for 1 to 59 minutes or 60 to 119 minutes per week had a 7 to 11% lower risk of death. Aerobic exercise on its own also showed strong benefits. Any amount above 7.5 MET hours per week was associated with a 26 to 43% lower risk of death.
The lowest mortality risk was seen among people who combined high levels of aerobic exercise with strength training. Those who accumulated 30 to 44 MET hours of aerobic activity per week and 60 to 119 minutes of strength training had a 45% lower risk of death. Even greater reductions were observed among participants who performed 45+ MET hours of aerobic activity per week. In that group, the risk of death was 53% to 58% lower regardless of how much strength training they did.
The researchers emphasized that this was an observational study, meaning it cannot prove that strength training directly caused the reductions in mortality risk. They also noted several limitations. Exercise habits were self-reported, which can introduce inaccuracies. The analysis did not include certain forms of strength training, such as calisthenics and Pilates. In addition, information was not available on the duration of individual workouts or the intensity of strength training sessions, factors that could have influenced the results.
Despite those limitations, the researchers concluded: “Our findings on different dose-response relationships between long-term resistance training with all-cause and cause-specific mortality suggest that different amounts of resistance training may be needed to optimize benefits across outcomes. The observed pattern that adding resistance training further reduced mortality risk across all levels of aerobic activity up to 45 MET hours/week supports current recommendations encouraging both types of activity to maximize mortality benefits.”